
How To Conduct a Residential Air Conditioning Check
Learn the importance of regular residential air conditioning checks to improve efficiency, extend your system's lifespan, and avoid costly repairs. Discover when to DIY and call in a professional for optimal AC performance.
Keeping your home cool and comfortable is essential, especially during those sweltering summer months. Regular residential air conditioning checks are key to maintaining efficiency, preventing unexpected (and costly) repairs, and extending the lifespan of your system. Consulting with an HVAC service expert is crucial for maintaining efficiency and preventing costly repairs.
In this article, we’ll dive into what an AC check involves, why it’s crucial for your home, and when to schedule one. Whether you’re a seasoned homeowner or new to the game, understanding the ins and outs of your AC’s health can save you time, money, and a lot of headaches. Let’s get started!
What is a Residential Air Conditioning Check?
An air conditioning check involves inspecting various AC system components, including indoor and outdoor units, for damage and efficiency. This includes cleaning or replacing air filters, checking refrigerant levels, and examining ductwork for leaks. Additionally, the technician tests the thermostat’s accuracy and ensures all electrical connections are secure for optimal performance.
Key Components and Step-by-Step Guide to a Residential AC Check
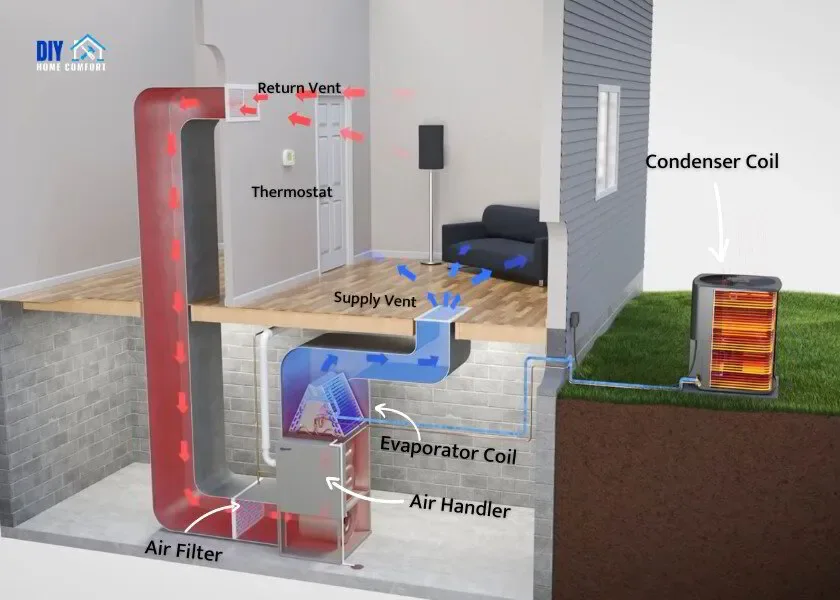
To keep your air conditioning system in peak condition, it’s essential to understand the key components inspected during a check and how to conduct a thorough evaluation. Below is a combined guide that outlines the critical steps and components involved in a residential AC check:
Step 1: Visual and Initial Inspection
- Outdoor Unit: Start by visually inspecting the outdoor unit. Look for signs of wear, damage, or obstructions like debris and vegetation that could block airflow.
- Unit Stability: Ensure the outdoor unit is level and securely positioned to prevent operational issues.
- Indoor Components: Check indoor components, such as the evaporator coil and blower motor, for dust buildup or leaks. Inspect air vents to ensure they are unobstructed and allow proper air circulation.
Step 2: Checking the Thermostat
- Calibration: Verify the thermostat is set to the correct temperature and mode (cooling). A miscalibrated thermostat can cause the system to cycle on and off too frequently, wasting energy and putting unnecessary strain on the AC components, leading to potential breakdowns. Proper calibration ensures that your system maintains the desired indoor temperature efficiently.
- Responsiveness: Adjust the thermostat settings and observe the system’s reaction to confirm accurate communication between the thermostat and the AC unit.
- Optimal Placement: The thermostat should be located away from direct sunlight or heat sources, which can affect its accuracy.
Step 3: Refrigerant Levels Inspection
- Pressure Measurement: Use gauges to check refrigerant pressure, ensuring it falls within the manufacturer’s recommended range. Refrigerant plays a crucial role in your AC system by absorbing heat from indoor air and releasing it outside. Proper refrigerant levels are essential for effective cooling and maintaining system efficiency.
- Leak Detection: Look for any signs of refrigerant leaks, which can lead to reduced cooling efficiency and potential compressor damage. Low refrigerant levels often indicate a leak in the system, which, if left unaddressed, can cause the compressor to overheat and eventually fail—one of the most expensive components to replace.
- Professional Handling: Only certified technicians should handle refrigerant due to safety and legal requirements.
Step 4: Electrical Component Inspection
- Wiring and Connections: Inspect all electrical connections for wear, corrosion, or looseness, which could pose fire hazards or disrupt system performance.
- Component Functionality: Check the capacitor and contactor to ensure they are operating correctly. The capacitor stores and releases energy to start the motor, and a failing capacitor can prevent the system from turning on or cause it to shut down unexpectedly. The contactor controls the flow of electricity to the compressor and fan; over time, it can wear out, leading to system failures. Regular inspections of these components help prevent unexpected breakdowns.
- Safety Precautions: Be alert for signs of electrical arcing or burning odors, which require immediate professional attention.
Step 5: Air Filters and Duct Inspection
- Air Filter Check: Inspect filters and replace them if necessary. Clean filters are essential for maintaining proper airflow, improving air quality, and ensuring efficient cooling performance. Consider the type of filter used—fiberglass, pleated, or HEPA—since high-efficiency filters, while excellent for air quality, may reduce airflow if not replaced regularly, causing the system to work harder and increasing energy consumption.
- Ductwork Evaluation: Examine the ductwork for leaks or blockages that could reduce the system’s efficiency. Duct leaks can lead to significant energy losses as cooled air escapes into unconditioned spaces, making your system work harder and reducing overall efficiency. Seal any leaks to ensure even air distribution throughout the home.
Regular AC checks are essential for maintaining a comfortable and energy-efficient home. By following these steps, you can ensure your system is running at its best, helping you avoid unexpected breakdowns and costly repairs.
If in doubt, always consult an air conditioning specialist to handle more complex inspections and repairs. Keep your home cool and your system running smoothly all year round!
Benefits of Regular Residential Air Conditioning Checks
Improved Efficiency
Regular air conditioning checks ensure your system runs efficiently, reducing energy consumption and lowering utility bills. By calibrating the thermostat, checking refrigerant levels, and replacing air filters, your AC unit operates smoothly, preventing unnecessary energy use.
Even small adjustments during routine checks can lead to significant improvements in efficiency, making regular maintenance a cost-effective way to keep your system in top shape. Monitoring temperature drops can help determine if the AC unit is effectively lowering the ambient temperature, which is a key indicator of efficiency.
Prolonged Lifespan of the Unit
Consistent AC checks help extend your unit's lifespan by catching minor issues before they become major problems. For example, early detection of a refrigerant leak can prevent costly compressor damage.
Systems that receive regular maintenance often last longer, saving you money in the long run. Routine checks also help maintain the manufacturer’s warranty, adding extra value.
Prevention of Costly Repairs
Routine AC checks prevent expensive repairs by identifying problems early. For instance, spotting worn-out electrical connections during an inspection can avoid more severe damage.
Early detection saves you from high repair costs and the inconvenience of unexpected breakdowns, ensuring your home stays comfortable year-round. Regular maintenance is a smart investment that pays off in the long run.
When Should You Schedule an AC Check?
Ideal Timing for AC Checks
The best times to schedule an AC check are in early spring, before the summer heat, or in the fall (Autumn for the non-Americans), after heavy usage. These periods ensure your system is prepared for peak performance and can address any wear from the previous season. Regular checks during these times help maintain efficiency and prevent unexpected breakdowns.
Signs Your AC Needs an Immediate Check
If your AC makes unusual noises, produces weak airflow, or shows inconsistent temperatures, it’s time for an immediate check. If the AC blows hot air instead of cool air, it indicates a potential malfunction requiring immediate attention.
These signs often indicate underlying issues like motor problems, duct leaks, or failing components. Addressing these symptoms early prevents further damage and ensures your system continues to operate efficiently.
Choosing a Professional for Your AC Check
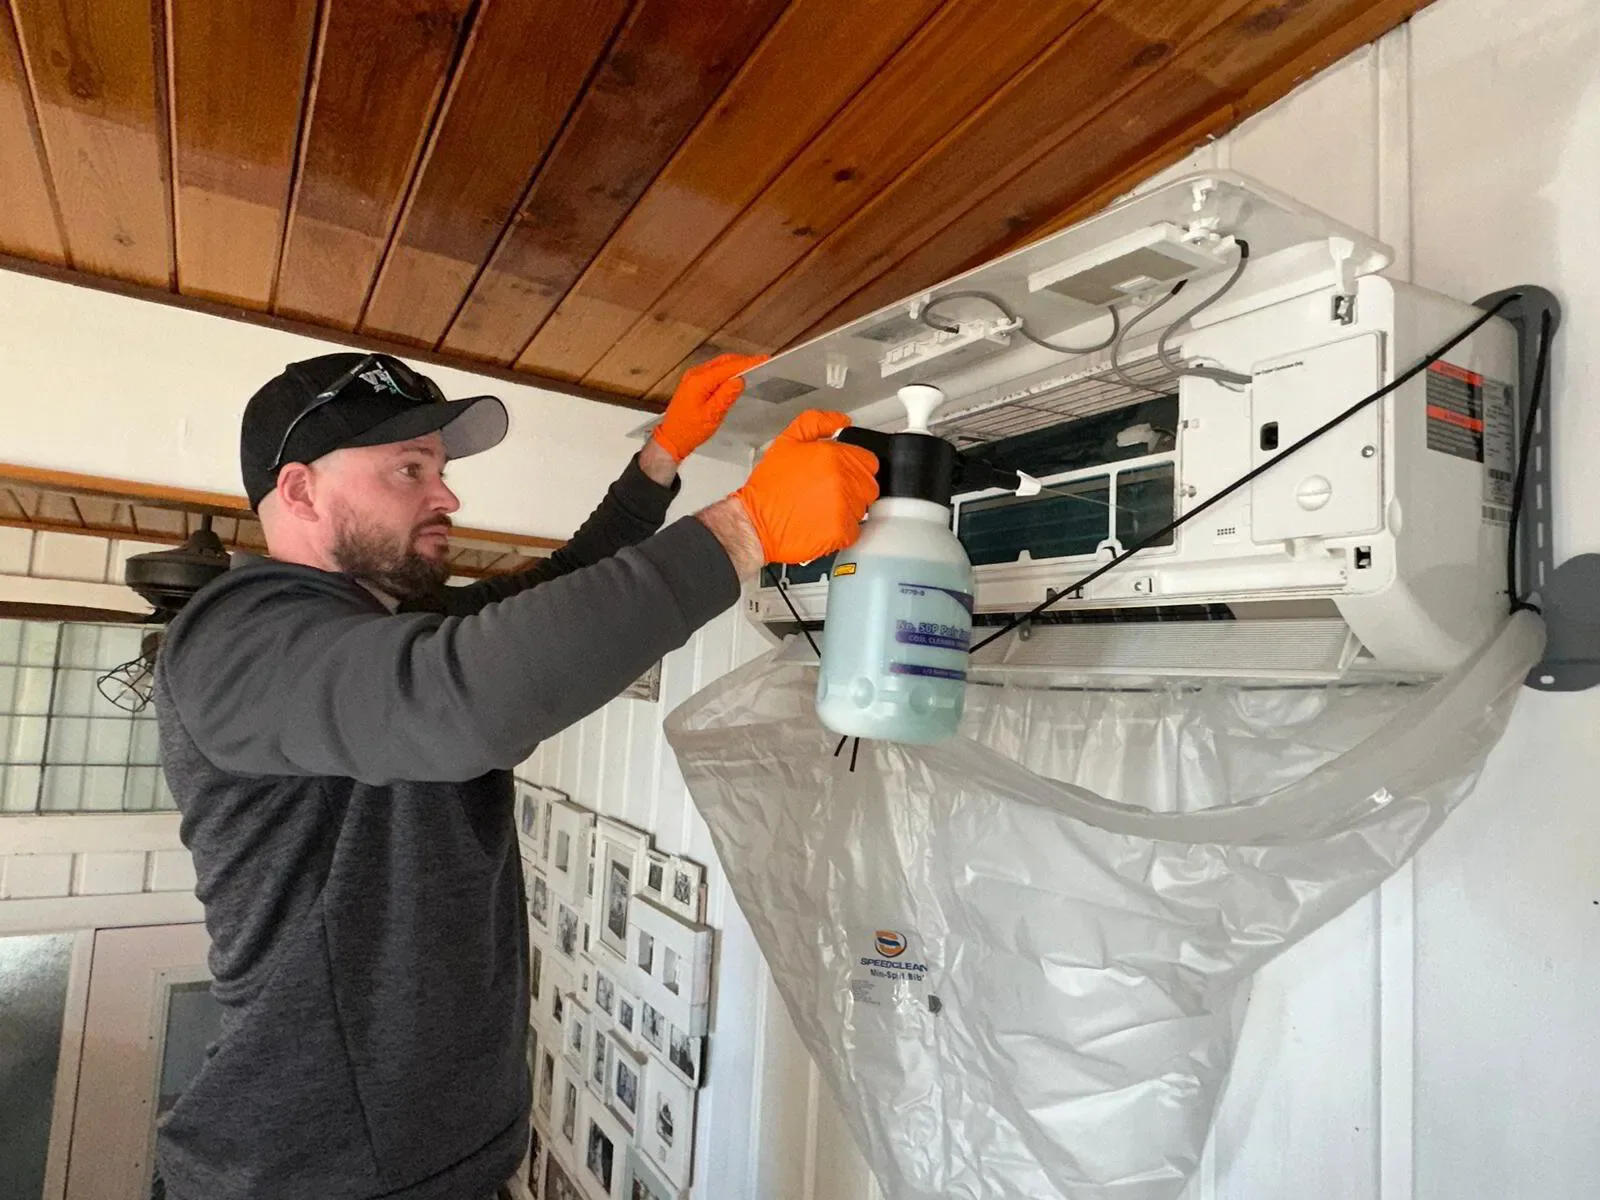
What to Look for in an Experienced HVAC Technician
Choose an experienced HVAC technician with proper certifications, such as NATE (North American Technician Excellence), and several years of experience. Check customer reviews for reliability and professionalism.
Ensure they offer clear, upfront pricing and guarantees on their work. A well-vetted technician ensures a thorough and trustworthy air conditioner check.
DIY vs. Professional AC Checks
DIY AC checks are great for simple tasks like changing air filters or checking the thermostat. However, just as with home repairs, while homeowners can handle some issues, others require professional expertise.
Hiring a professional is recommended for thorough inspections, especially those involving electrical components or refrigerant. Professionals have the specialized tools and knowledge to detect and address issues that DIY checks might overlook, ensuring your system runs efficiently and safely.
Conclusion
Regular residential air conditioning checks are essential for running your system efficiently, extending its lifespan, and avoiding costly repairs. Whether tackling a DIY inspection using tips from DIY Home Comfort or scheduling a professional air conditioning service, taking action now ensures your home stays cool and comfortable.
Remember, a little maintenance goes a long way. For more tips and insights, read our other HVAC articles. Don’t wait—make your AC’s health a priority today!

Scott Harding
Scott is the main author of DIY Home Comfort. He's also an experienced HVAC technician that enjoys home renovation and spending time with his family. You can find out more about him here.