How to Remove Shower Drain Cover: A Step-by-Step Guide
With our step-by-step guide, you can learn how to remove a shower drain cover. You can also discover the tools you need, different methods for various covers, and tips for maintaining a clean drain.
Are you struggling with a clogged shower drain and need to remove the cover to fix the problem? Whether you're dealing with slow drainage or a complete blockage, knowing how to remove your shower drain cover is essential for any homeowner.
In this guide, we'll walk you through the process step-by-step, ensuring you can confidently tackle this task. By the end, you'll clearly understand how to remove a shower drain cover safely and efficiently.
Key Takeaways
- Identify the Drain Cover Type: Knowing whether your cover is screw-in, snap-in, or push-pull is crucial for proper removal.
- Gather Necessary Tools: Ensure you have a flathead screwdriver, Phillips screwdriver, needle-nose pliers, rubber gloves, and a small container for screws.
- Follow the Correct Removal Steps: Use specific techniques for each drain cover type to avoid damage and ensure safe removal.
- Clean the Drain Thoroughly: After removing the cover, clean out visible debris. For deeper clogs, consider using a plumber's snake or chemical cleaner.
- Regular Maintenance: Regular cleaning and maintenance can prevent future clogs and keep your shower drain functioning properly.
Why Remove a Shower Drain Cover?
Shower drain cover removal is often necessary for cleaning and maintenance. Over time, hair, soap scum from soapy water, and debris can accumulate, leading to slow drainage or blockages. Regular cleaning can prevent these issues and keep your shower functioning properly.
Removing the drain cover is a preliminary step if you use a plumber’s snake or other tools to clear a clog further down the pipe.
Tools You'll Need
Before you begin, gather the following tools:
- Flathead screwdriver
- Phillips screwdriver
- Needle-nose pliers
- Rubber gloves
- Small container or bag (for screws)
Step-by-Step Guide to Removing a Shower Drain Cover
1. Identify the Type of Drain Cover
There are several types of shower drain covers, including screw-in, snap-in, push-pull, lift-and-turn, toe-touch, and pop-up covers. Identifying the type you have is crucial for determining the correct removal method.
2. Remove a Screw-In Drain Cover
If your drain cover is secured with screws:
- Locate the Screws: Look for screws around the perimeter of the drain cover.
- Unscrew: Use the appropriate screwdriver (usually a Phillips head) to remove the screws.
- Lift the Cover: Once the screws are removed, gently lift the cover using the screwdriver for leverage if needed.
3. Remove a Snap-In Drain Cover
For snap-in covers:
- Insert the Screwdriver: Insert a flathead screwdriver between the drain cover and the shower floor.
- Pry Upward: Carefully pry the cover upward. Apply even pressure to avoid damaging the cover or the surrounding area.
- Remove the Cover: Once it starts to lift, you can use your fingers or needle-nose pliers to pull it out completely.
4. Remove a Push-Pull Drain Cover
Push-pull drain covers are often found in bathtubs but can also be in showers:
- Set to Open Position: Set the drain cover to the open position by pulling it up.
- Unscrew the Top: Hold the base of the cover and twist the top counterclockwise to remove it.
- Remove the Base: Use a flathead screwdriver to unscrew the base from the drain if it’s attached with a screw.
5. Remove a Lift-and-Turn Drain Cover
Lift-and-turn covers are common in bathtubs and showers:
- Open the Cover: Turn the cover counterclockwise and lift it to the open position.
- Unscrew the Cover: Hold the stem in place and turn the cover counterclockwise to remove it.
- Remove the Cover: Lift it off the drain once it's unscrewed.
6. Remove a Toe-Touch Drain Cover
Toe-touch drain covers operate with a spring-loaded mechanism:
- Set to Open Position: Press down on the cover to set it to the open position.
- Unscrew the Cover: Twist the cover counterclockwise to remove it from the base.
- Remove the Base: If the base is secured with a screw, use a flathead screwdriver to remove it.
7. Remove a Pop-Up Drain Cover
Pop-up drain covers are typically found in combination with bathtub showers:
- Open the Cover: Lift the cover to the open position.
- Remove the Stopper: Twist the stopper counterclockwise to unscrew it from the drain.
- Remove the Cover: Lift the cover out of the drain once the stopper is removed.
Cleaning the Drain
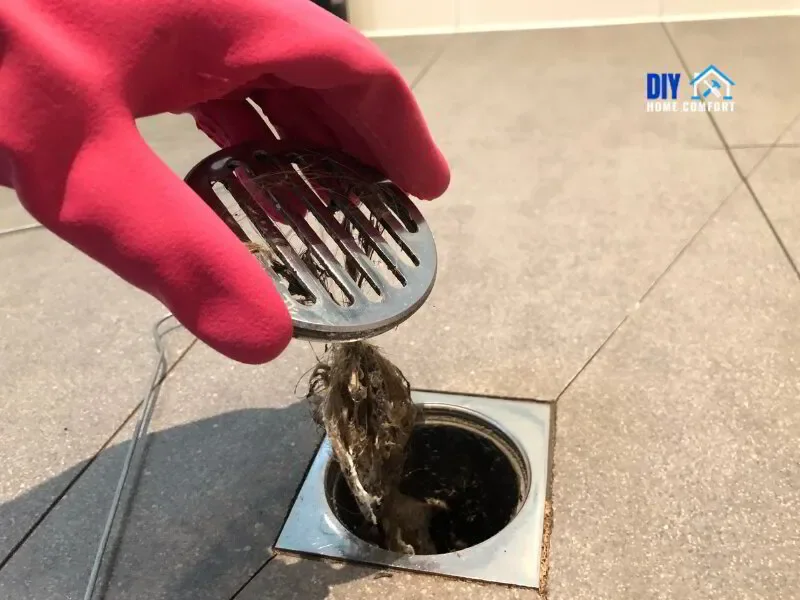
After removing the drain cover, clean out any visible debris. Use a toothbrush to remove all the hair.
You can also use baking soda and vinegar to unclog the drain as a DIY fix. Use rubber gloves to remove hair and soap scum. Consider using a plumber’s snake or a chemical drain cleaner if the clog is deeper. Rinse the area with hot water to wash away any remaining scum.
Conclusion
Removing a shower drain cover is a straightforward process that can save you from costly plumbing repairs. By following the steps outlined in this guide, you can maintain a clean and efficient shower drain. Regular maintenance and cleaning will keep your shower in top condition and prevent future clogs.
Is your shower drain still causing problems? Visit our blog for the latest updates on plumbing maintenance and DIY project tips. Don’t let a clogged drain disrupt your day—tackle it with confidence!

Scott Harding
Scott is the main author of DIY Home Comfort. He's also an experienced HVAC technician that enjoys home renovation and spending time with his family. You can find out more about him here.